|
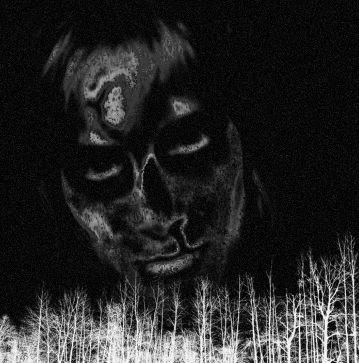
Final Image Preview: For downloading the wallpaper click the image  Open a new document in Photoshop with this size: 1280x1024, and a resolution of 72. Paint the background layer in black, and add noise (menu Filter/Noise/Add Noise) with these settings: amount 8,79%, gaussian, monochromatic. Select the brush number 4 of my Tree Photoshop Brushes. Adjust the brush size to 1290 and apply it over a new layer, using white color. Create a new layer, and use the Magic Wand Tool to select the space below the trees.  Fill it with white too, and move the layer that contains the trees a bit down until they merge. Now, add noise to the ground layer and the trees layer with the same settings than before (8,79%, gaussian, monochromatic). Create another layer and add a moon. Use my Planets Brushes. In this example, the brush "Europa" was used.  The wallpaper has gained a mystery atmosphere. Now use an image that you like. It can be a witch, a pumpkin, or a zombie, like in this case. I have used this image by Sewzi-stock. You can see her work in her gallery of Deviant Art. Open the image in Photoshop and select using the menu Select/Color Range, and picking the most interesting pixels. For this image, I used a Fuzziness of 148. Copy and paste the selected pixels inside a new layer of the wallpaper. Turn it to black and white with the menu Image/Adjustments/Desaturate.  Use a soft round brush from the Basic Brushes (that come with Photoshop) to place 2 or 3 red points near the eyes.  Use Filter/Blur/Motion Blur several times. Here I used an angle of 27 degrees and 262 pixels. Move the layer with this glow on top of all the others.  To integrate the different layers better, create a new layer, fill it in black, and add noise (menu Filter/Noise/Add Noise) with these settings: amount 88,08%, gaussian, monochromatic. Use Filter/Blur/Motion Blur to turn it into inclined lines.  In the Layers tab, change this layer mode to "Soft Light", and move it to place this layer just below the layer with the eyes glow. Through the menu Image/Adjustments/Hue-Saturation turn it red with these settings: +4 +61 +0. Some final adjustments make the eyes glow layer look better. For example, setting the Opacity to 71%.  To make the title use color #601717 and font Isabella. Rasterize the text, so you can manipulate it (Layer/Rasterize/Type). Apply the filters: Distort/Ripple, Texture/Craquelure, and Brush Strokes/Spatter. Then, double-click this layer and apply the effects Inner Shadow and Satin.  For downloading the wallpaper click the image
-Emma Alvarez- © 2008 by Emma Alvarez. Link to this post without copying the text. If you liked this post, find more in categories:Design Resources Some Related Posts: If you liked this post, subscribe to Emma Alvarez Site or  Stumble it! Stumble it!

|
Halloween Wallpaper Tutorial
|
|
Subscribe to:
Post Comments (Atom)


0 comments:
Post a Comment